
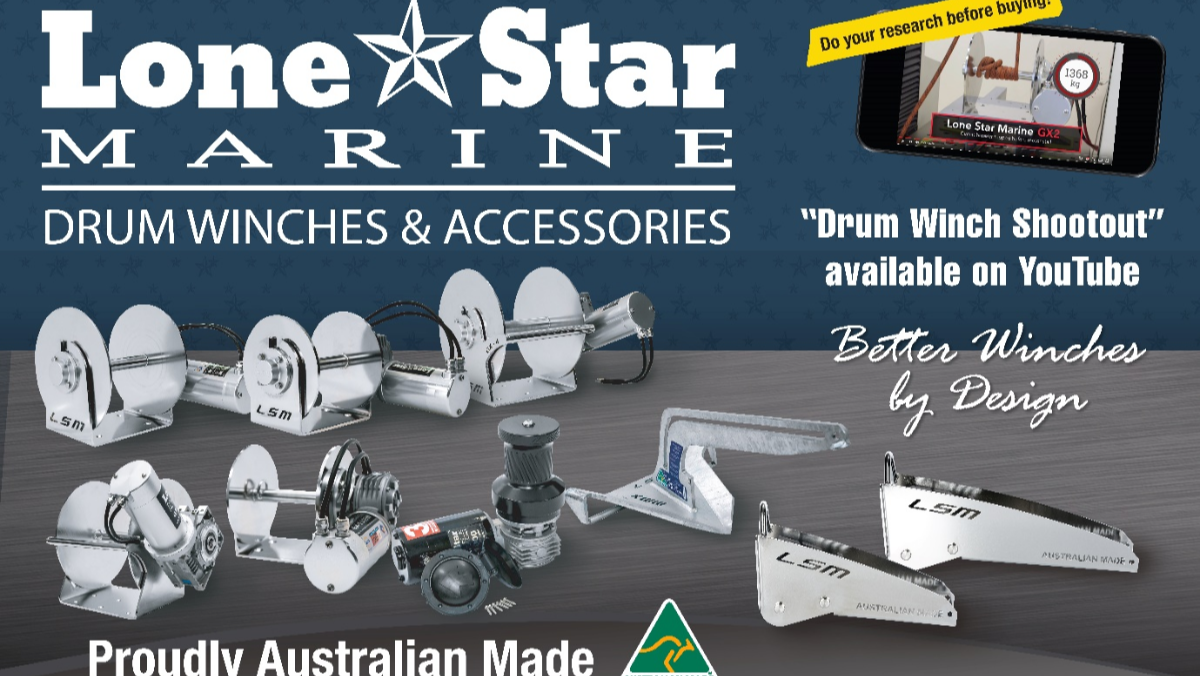
Lone Star Winches Melbourne – Premium Electric Boat Winches
Upgrade your boating setup with Lone Star Winches in Melbourne, trusted by Australian boat owners for performance, strength, and reliability.
At Form A Sign, we supply and install Lone Star electric anchor winches, helping recreational and commercial boat owners across Melbourne and Victoria improve anchoring safety and ease.
Lone Star Winch Supply
We offer complete anchor winch solutions including:
Electric Anchor Winch Supply
✅ Genuine Lone Star marine winches
✅ Suitable for aluminium & fibreglass boats
✅ Range of sizes for different vessel types
Winch Upgrades & Replacements
✅ Replace outdated manual anchor systems
✅ Upgrade for easier, faster anchoring
✅ Improve safety and efficiency
We can recommend installers

Trusted Winch Systems for Australian Conditions
Boating in Victoria demands equipment that can handle:
✅ Saltwater exposure (Port Phillip Bay)
✅ Strong tides & currents (Western Port Bay)
✅ Heavy anchor loads
Lone Star Winches are built for tough Australian marine environments, delivering:
✅ Powerful electric retrieval
✅ Heavy-duty construction
✅ Reliable anchoring every time
What is the best winch for my boat?
Ideal for Fishing Boats & Offshore Use
Lone Star Winches are a popular choice for:
✅ Serious fishing boats
✅ Offshore vessels
✅ Charter operations
✅ Recreational boat owners
Key Benefits:
✅ Faster anchoring and retrieval
✅ Reduced manual effort
✅ Increased safety in rough conditions
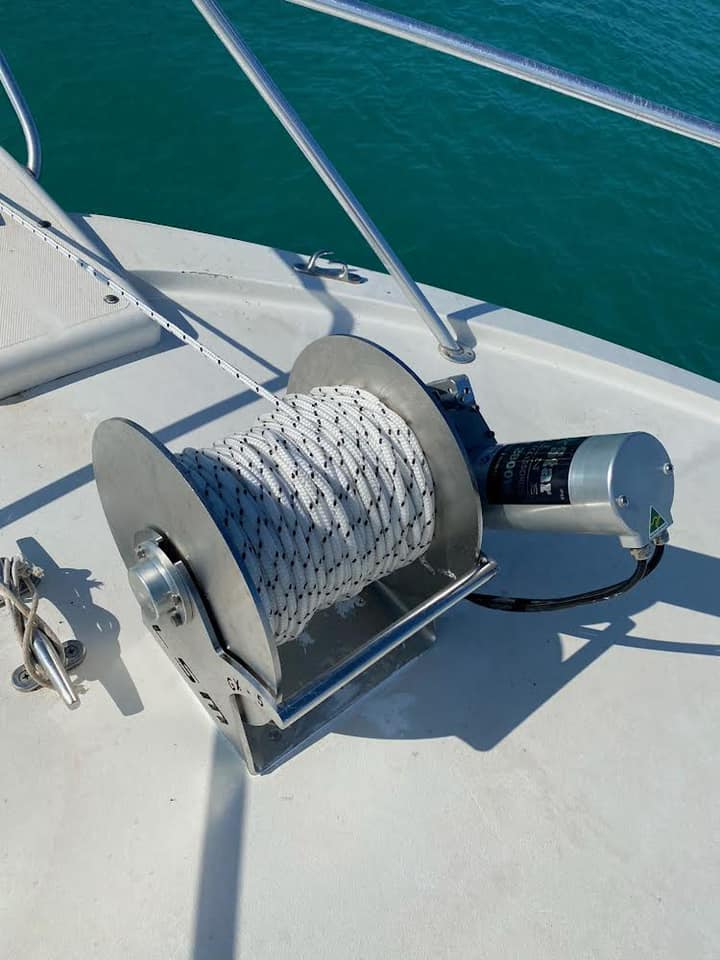
Your number one consideration is your boat’s rope and chain capacity. How much rope and chain do you need for your boat length, and what is your anchoring depth application? You can then pick your GX Series winch to suit.
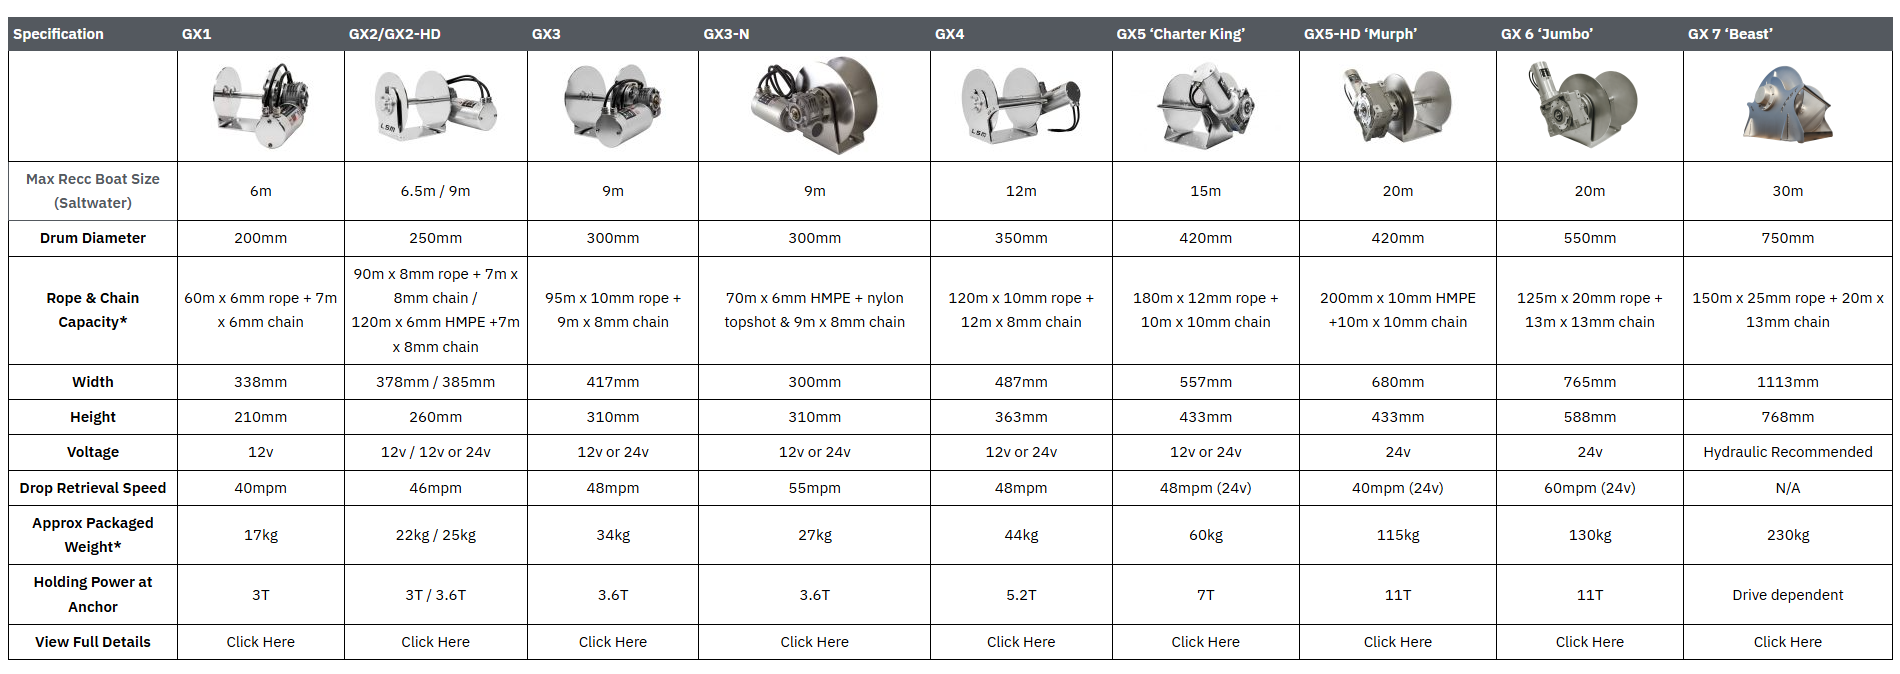
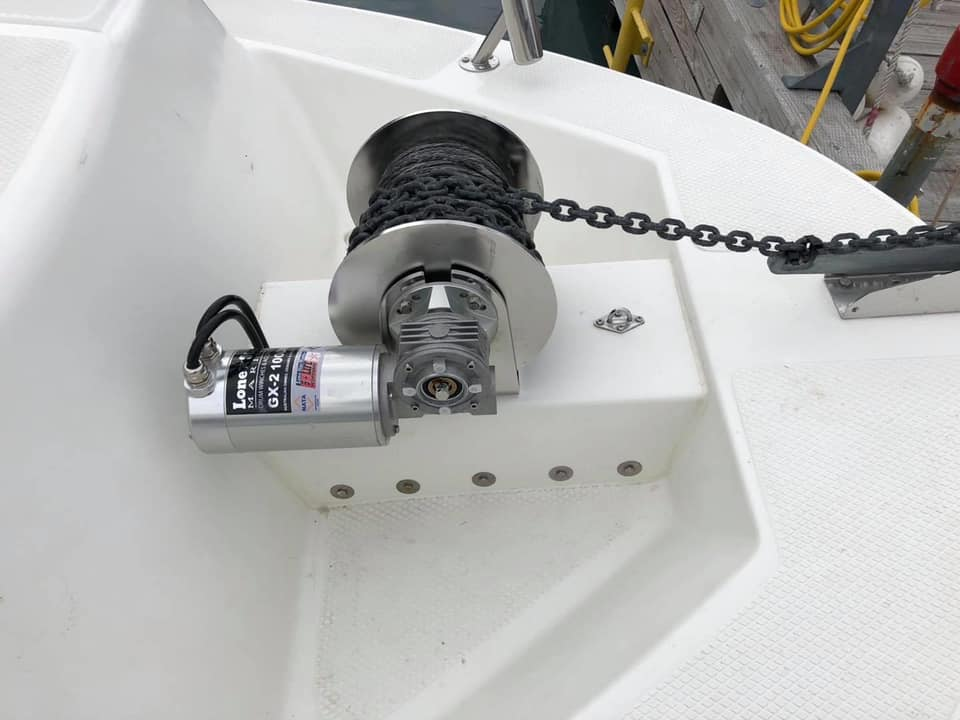
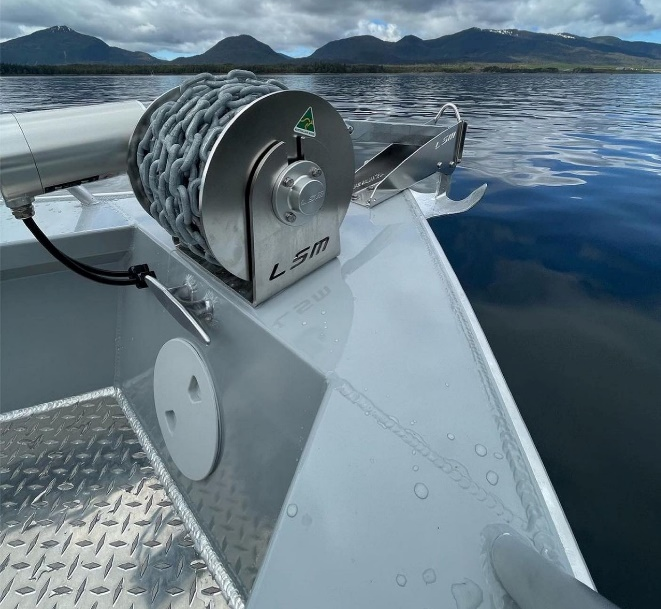
GX Series Winch Kits – Brushed Winches
GX Winch Kits are available in 3 combo kit configurations to suit a variety of vessels and anchoring depths.
Each combo kit includes the GX1 Winch Kit plus rope & chain, deck roller, chain guard, and anchor swivel.
DBN is double braid nylon, HS is HMPE hi strength rope. All HS kits include a nylon topshot for stretch.
Find Lone Star Marine GX Anchor Brushed Winch products on our on-line shop.
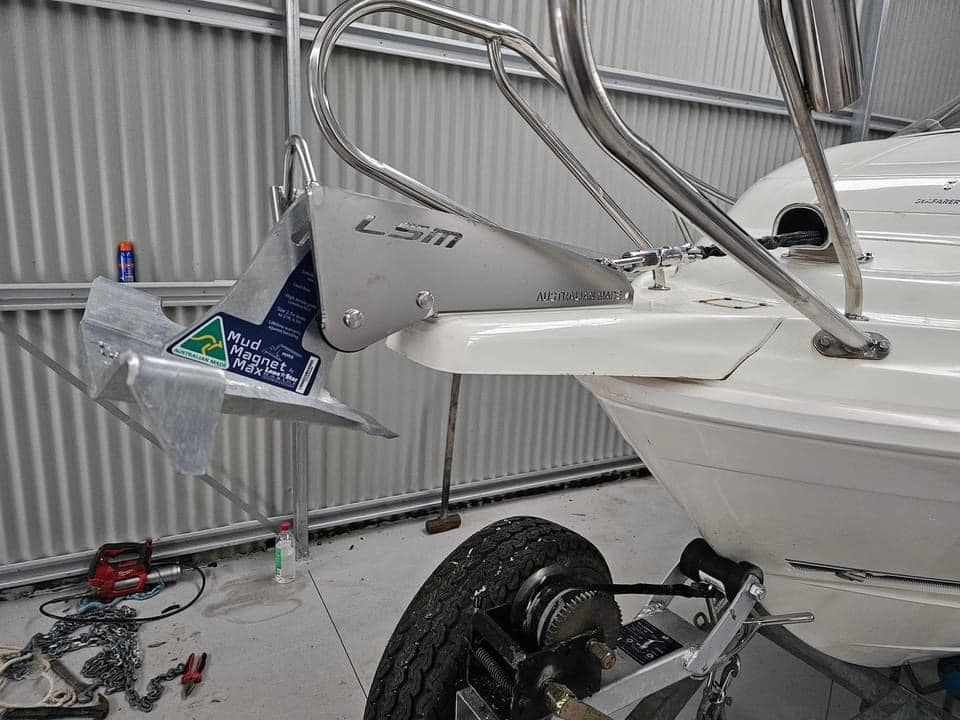
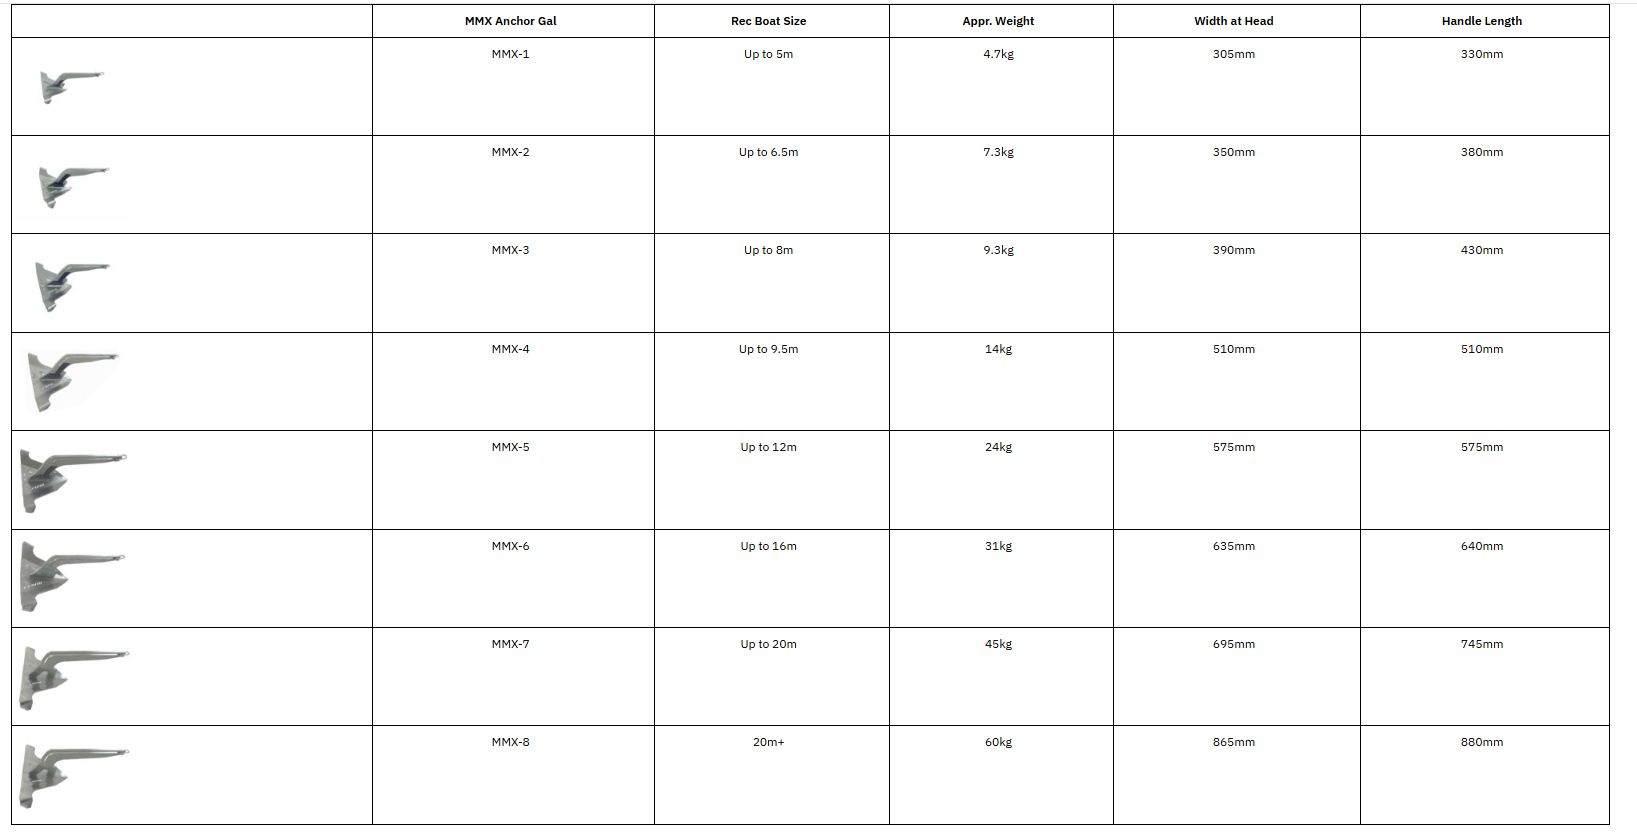
Which Anchor should I choose for my boat size or fishing conditions?
Lone Star Marine spent 16 months developing the MMX series of anchors. They were designed to tackle the worst in anchoring substrate, soft mud. The MMX Anchor is an anchor suitable for any seabed and any boat. The MMX anchor is designed to set fast and dig deep.
Featuring a lead free/hoop free design the MMX is Manufactured in Australia from High Tensile Steel Plate. The Lone Star Marine innovative retrieval slide drops all the way to the head for 170 degree retrieval in rock or reef. With a massive holding power to weight ratio, the MMX features minimum 8mm plate head construction (min. 10mm handle) for incredible strength, excellent balance, and displacement. Stabilizing wings and a folded drop tip design ensure excellent setting immediately and reduce the chance of the anchor breaking free in a tide change. All sizes avialable in hot dipped gal finish, MMX2, MMX3, MMX4 also available in 316 stainless steel.
The MMX anchor series will not disappoint.
• Fast Setting
• Lead Free
• Hoop Free
• Retrieval Slide
• High Holding Power
• Suitable for Most substrates
• Manufactured in Australia
• Lifetime Warranty Against Bending
Find Lone Star Marine MMX Anchor products on our on-line shop.
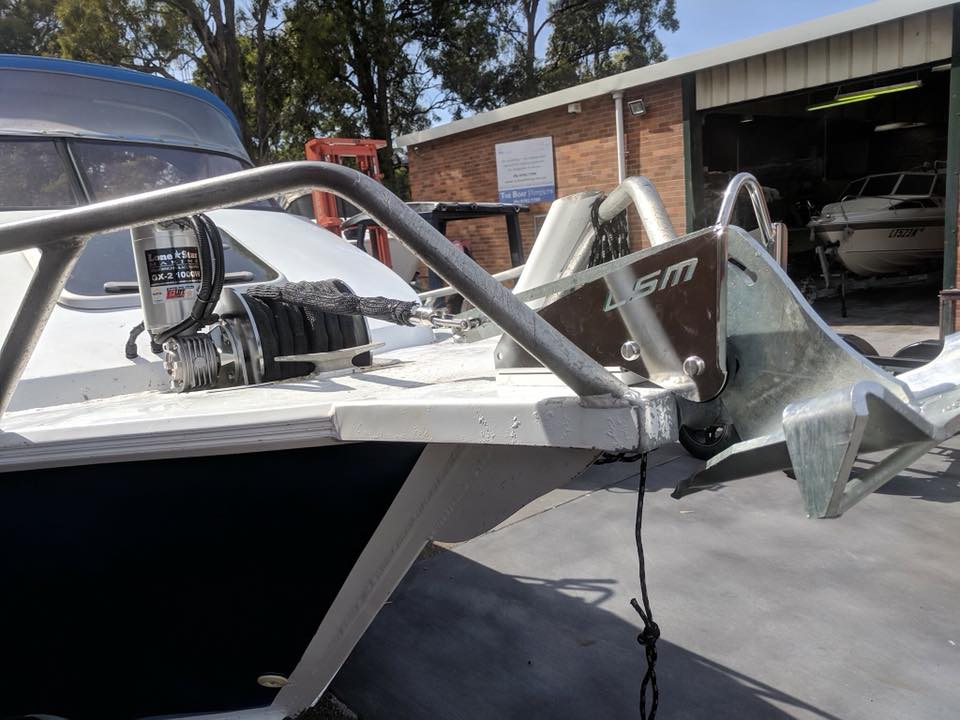
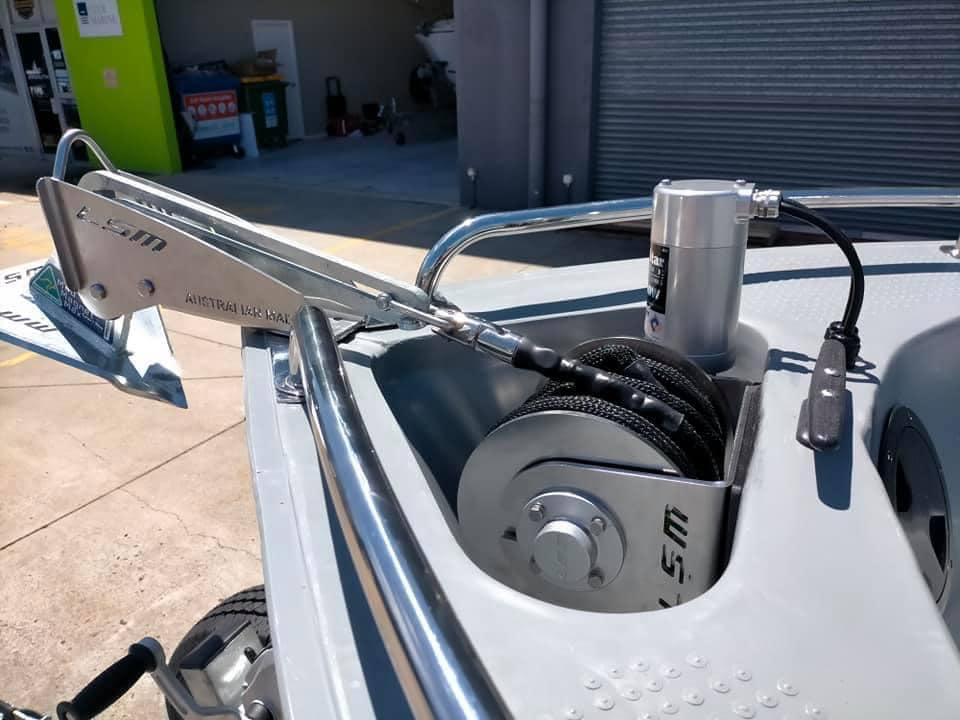
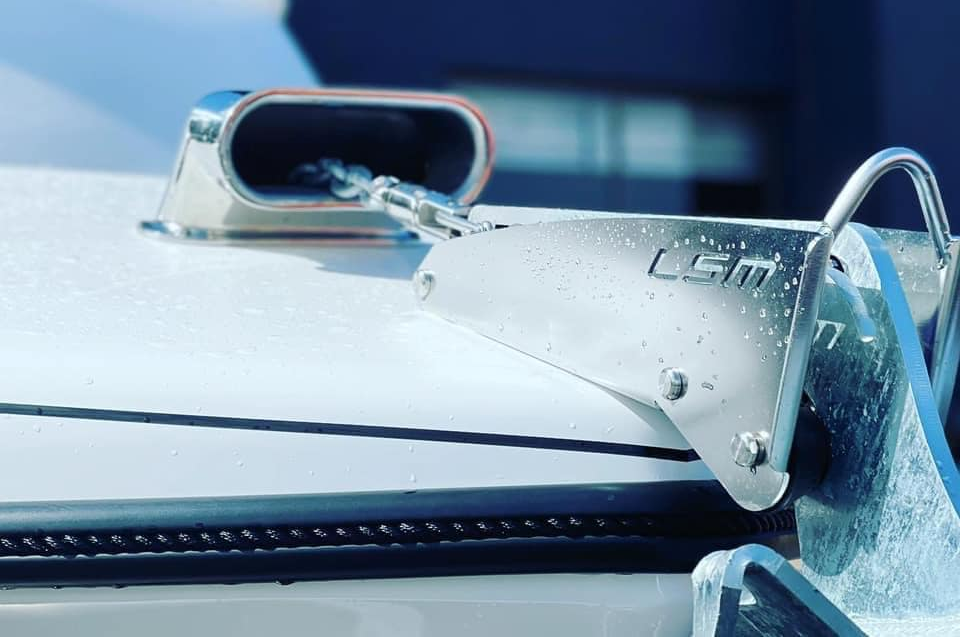
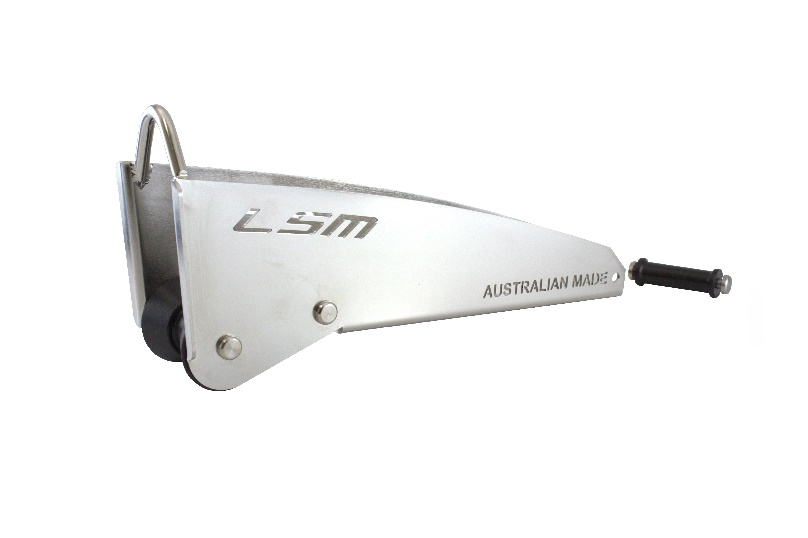
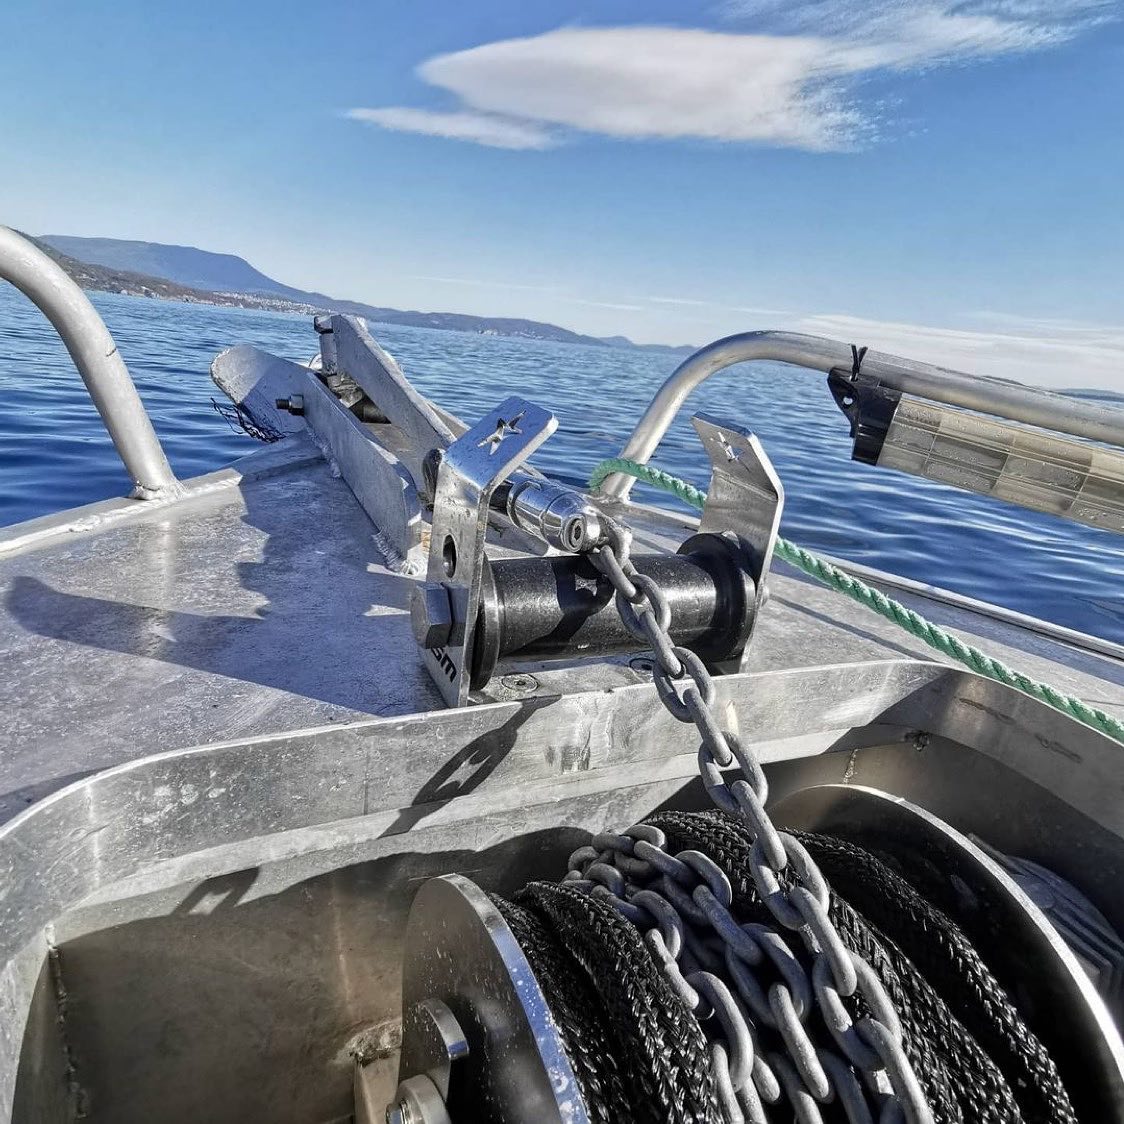
Do I need a bow sprit?
Depending on the placement of your anchor and winch, you may require a bow sprit. Bow sprits help anchors separate the distance between the boat and the anchor when it is retrieved so there is clearance.
Lone Star Marine’s CX range of bow sprits feature durable heavy gauge 316SS in a mirror like finish. With a wider opening, the CX range is suitable for almost any anchor and style. These are a static spirit with no hinge or moving parts and arefavored by commercial fishermen and those who are seeking ultra-tough anchoringaccessories, these spirits are meant to be used day in day out.
Rollers are made in durable HD with a 10 year UV life. The bolts are custommachined with a sleek button finish, a much better look than nyloc nuts and hexhead bolts.
CX series bow spirits are 100% Australian made with all extrusions, machining,stainless steel, and polishing all done in house at Lone Star Marine’s factory.
The CX series of bow sprits are available in 4 sizes for boats to 60ft + and anchors to 50kg.
How do you install your bow sprit? Check out some great advice from Lone Star Marine.
https://www.youtube.com/watch?v=LnCp1jC6wlAFind Lone Star Marine Anchor bow Sprit products on our on-line shop.
Does my boat anchor set up require a hawse pipe or deck roller?
Watch Lone Star Marine explain if you require a hawes pipe or deck roller. https://www.youtube.com/watch?v=txZovN-7Ic4

Hawes Pipe
If your anchor is mounted under the deck in
the anchor well, you will require a hawse pipe. This allows the rope and chain to feed into the winch, without damaging your boat or tangling.

Lone Star hawse pipes are:
• Ideal for applications where the winch is mounted close to the top deck
• Allows even rope & chain distribution across the drum
• Suitable for large drums close to the top deck
• Keeps the rain out of your boat
• Use instead of a deck roller
• Comes with 8 pre-made mounting holes
• Includes Mounting hardware
• High Polish 316 SS ConstructionSpecs
• Mounting Surface 100x225mm
• Overall Height 120mmFind Lone Star Marine Anchor Hawse pipe products on our on-line shop.
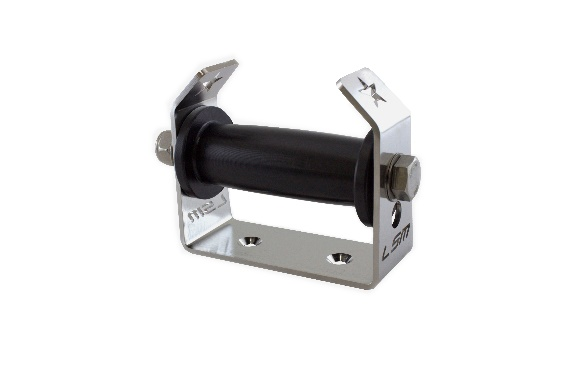
Does my boat anchor set up require a Deck Roller?
A Deck roller will help the feed of the line when you drop or retrieve your boat anchor.Lone Star’s CR Series Deluxe Deck Roller is a Stainless Steel roller with curved design for better Line lay and a higher capacity. The roller features an adjustable height pin to suit different Deck designs and custom installations.
- Available with 135mm or 195mm Roller
- Captive Design
- Adjustable Height
- High Polished 5mm 316SS Base (Australian Made)
- HD UV stabilized roller, extruded & machined in Australia
- Curved design for better line lay and capacity
- 2 predrilled countersunk mounting holes
- Includes mounting hardware
How much Rope and Chain do I need for my boat anchor?
Boat Anchor Chain Length
A good guide for boat anchor chain length is to use 1 and a half to two times the length of the boat. However, the heavier the boat, the more chain that is recommended. The purpose of the chain is to hold the anchor onto the floor of the ocean. So ideally a 7 meter boat would require 14 meters of chain. There is also a minimum of 10 meters of chain required.
Boat Anchor Rope Length
- Length: A general guideline for a standard anchor setup is 50 meters of rope, depending on the size of your craft, the depth of water you anchor in, and the wind conditions.
- Boat Size (Rope Length):Under 6m (20'): ~50m of rope. 6m – 8m (20'-26'): ~50m of rope. Over 8m (26'+): 60m or more.
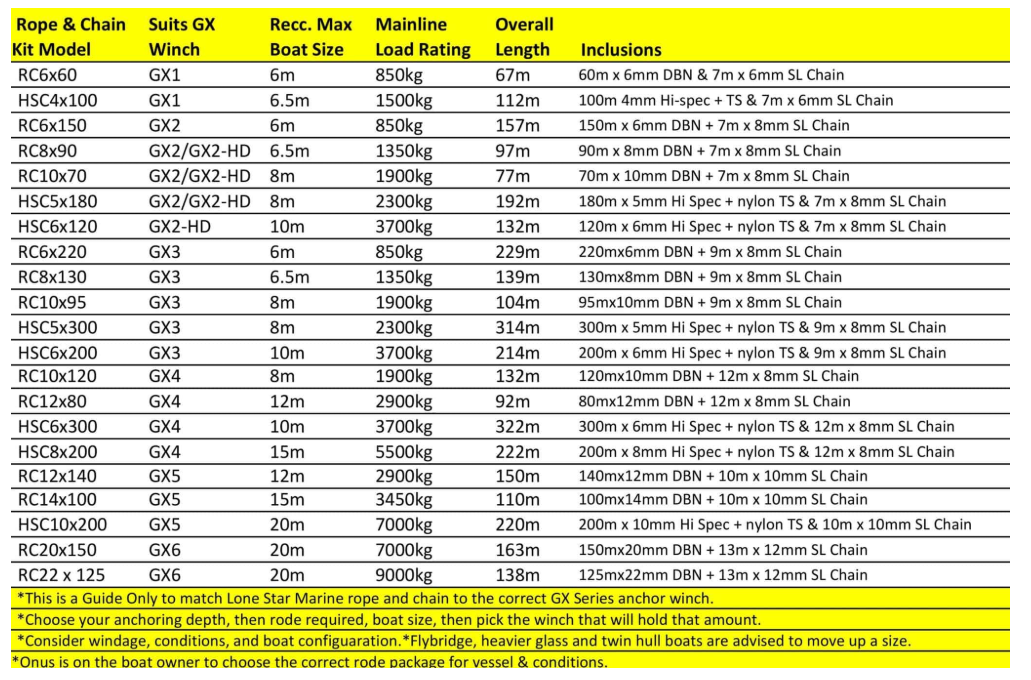
You also need to ensure the drum on your Lone Star Anchor winch is large enough to fit the length of rope and chain you require for your conditions.
The table below explains the standard rope and chain lengths contained in the standard Lone Star Rope and Chain kits.
Which type of Boat Anchor rope should I use?
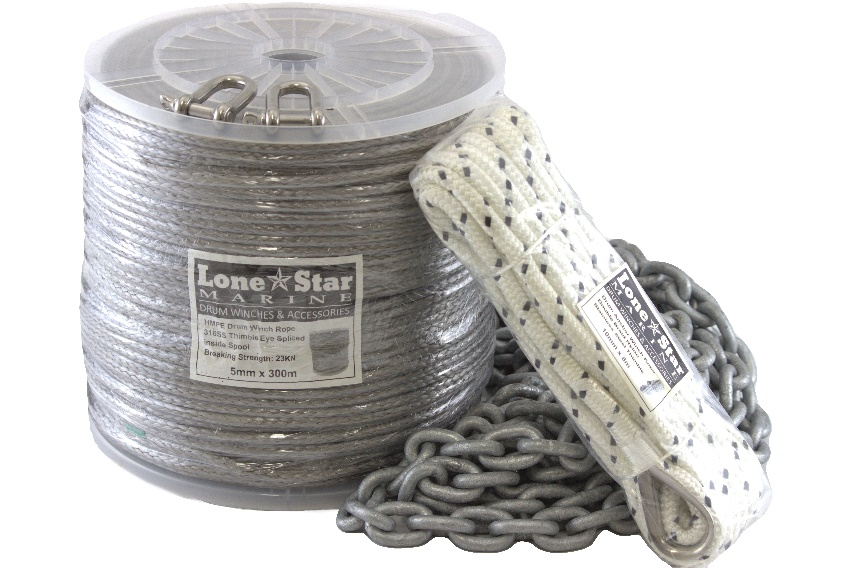
Lone Star Marine’s anchor rope is available in Double Braid Nylon or Hi Spec HMPE options.
The benefit of double braid nylon is that is has excellent stretch without damaging the ropes fibers. In the above table, RC indicates double braid nylon rope.
HMPE Hi Spec Rope is the same product used in 4WD winches. It is stronger than steel per diameter and goes a long way to adding extra length per given drum size. All HMPE rope kits come with a double braid nylon tops shot for stretch. HSC in the above table indicates HMPE line.
Boat anchor chain is available in 6, 8, 10, and 13mm short links. All of Lone Star Marine’s short link chains are Grade L and comply with the DIN766/A Standard sizing, it is burr free for a smooth finish.
All Lone Star Marine rope and chain kits include 316SS D-shackles.
Check out Lone Star Marine’s youtube guide on how to install your rope and chain.
http://youtube.com/watch?v=fN5LGGB5Vug
Find Lone Star Marine boat anchor chain guard on our on-line shop.
How do I install my Lone Star Marine boat anchor winch?
Check out some great advice from Lone Star Marine on how to Spool your GX Series Drum Anchor Winch with rope. https://www.youtube.com/watch?v=TRPVjePT4HM
How do you attach your anchor to your rope and chain? Lone Star Marine explains. https://www.youtube.com/watch?v=g4uk-WGqm3Q
Check out some great wiring tips for your GX Anchor from Lone Star Marine. https://www.youtube.com/watch?v=g4uk-WGqm3Q
What other useful accessories are available for my boat anchor winch setup?
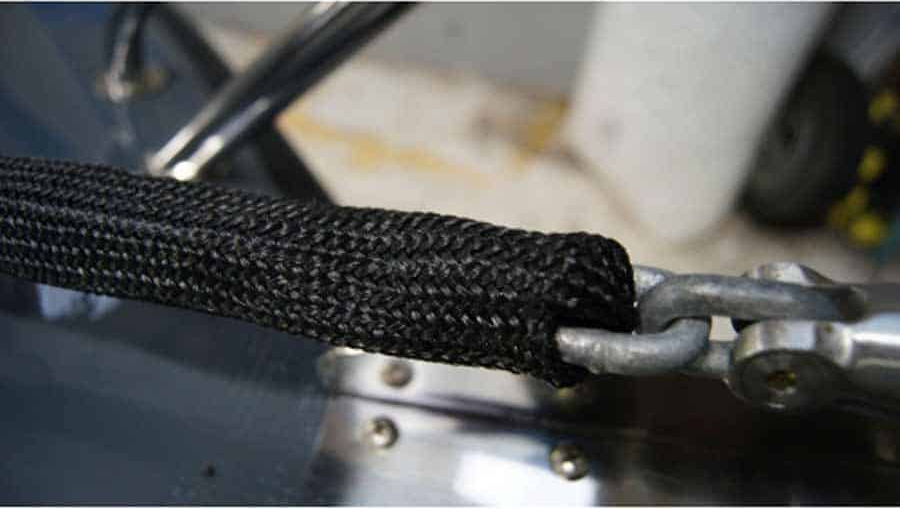
Chain Guard
Fishing for timid fish like snapper or whiting? Lone Star Marine’s Chain Guard was developed to reduce the noise of chain going over the deck rollers and hawse pipes when you release or retrieve your boat anchor.
- Prevents scaring fish away by reducing noise
- Further prevents chain damage to your boat surfaces
- Long-lasting material (ticker and stiffer tight weave pattern)
- Comes in 8m, 10m and 12m lengths
- Suitable for 6mm and 8mm chain
Lone Star Marine demonstrates how to add chain guard to your boat anchor chain.https://www.youtube.com/watch?v=O61BlGPRNd8 Find Lone Star Marine boat anchor chain guard on our on-line shop.

Drum Anchor Winch Digital Line Counter
Lone Star Marine’s digital drum anchor line considers anchor drum width, diameter, shaft size, rope diameter, & overall rode length to produce extremely accurate depth readings. Simply enter the diameter and length of rope and chain on your drum and the DLC will take care of the rest.
https://www.youtube.com/watch?v=2yCihMyap_s
Find Lone Star Marine digital line counters on our on-line shop.

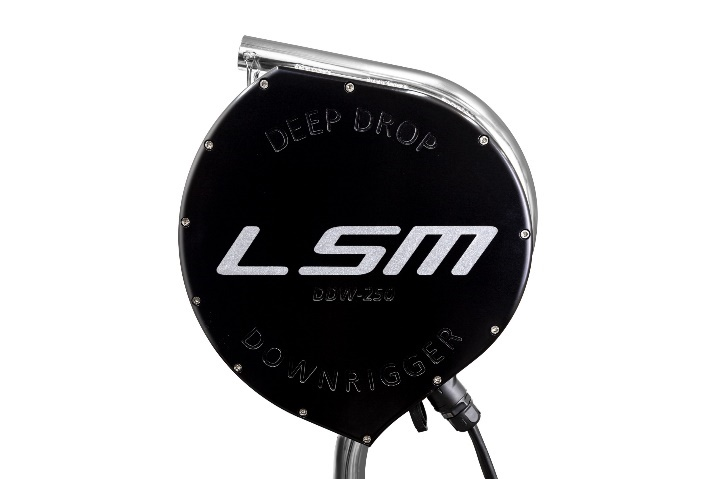
Lone Star Marine Downrigger
Want to get your bait down deep, where the large fish are?
https://www.youtube.com/watch?v=Wo5dyRT02oo
Ask us about the new product available from approximately April 2026.
Lone Star Marine’s DDW-250 Deep Drop and Down-Rigging features a brush less drive, variable speed, digital line counter, 1 piece frame, wider drag curve plus more….
- 316 Stainless Steel & Marine Grade 6061 T6 Marine Grade Anodised Aluminium Construction
- Solid 38mm Drive shafts suitable for extended heavy loads
- Brush-less drive with Variable Speed control
- Italian Made Transmissions
- Specialised for Deep Drop Fishing & Heavy Down-rigging
- Digital Line Counter can be set to meters, feet, or fathoms (AU preset to meters)
- Line proximity alarm
- Changeable throat depth on spool for Mono or Braided lines
- Braid Capacity 1500m x 200lb braid (with spool spacer)
- Mono Capacity 700m x 300lb mono (without spool spacer)
- 12 or 24v operation
- Up to 110m (375ft) per minute retrieval speed (12v)
- Up to 200m (680ft) per minute retrieval speed (24v)
- Fully Sealed for very low maintenance
- Very high efficiency, as little as 10 amps under light load
- Long Duty Cycle
- Smooth Powerful 2 stage drag can be set from very light to over 100KG
- No Drag side-load at higher settings
- No Cam adjustment
- No High Pitched reel noise
- 4 position gimbal mount
- Boom can be removed and stored when not in use
DDW-250 Combo Kit Includes:
- Complete Deep Drop Winch
- Rod Holder Mount
- 50 Amp MP Circuit Breaker
- Power plug + 5m twin core power lead (no Anderson plugs)
- 4 battery lugs & heatshrink
- Fibreglass Boom (DDW-250FG Combo) 316 Stainless Steel Boom (DDW-250SS Combo)
- LSM Closed Sheave with SS bearings• Bearing oil
- Cal’s drag grease
Your unit comes complete ready to fish deep drop or down-rig unit, all you need to supply is line.
Booms are available in either fibreglass or 316 stainless steel:
Fibreglass booms are made for reducing shock loads in swell or with larger fish and need to be used with larger 4-8kg weights.
Stainless Steel Boom Options are preferred by many commercial fishermen. They are also the better option when using the DDW as a down-rigger.
Find Lone Star Marine Downriggers on our on-line shop.
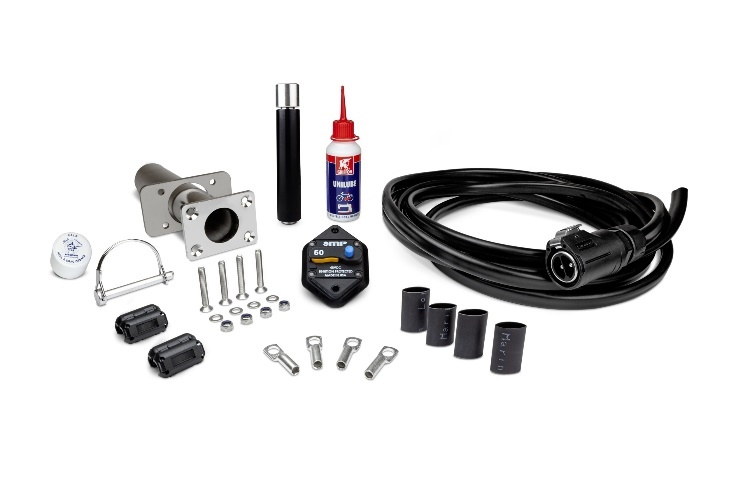
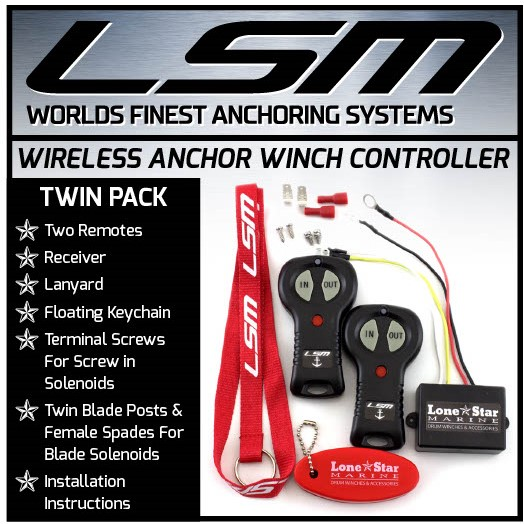
GX Series Boat Anchor Wireless Remote Control
Operate your anchor from anywhere within
your boat. Lone Star’s Marine Wireless
Remotes are suitable for all GX Anchor Winch makes and models (except Elite
Series) and will fit your current switching system & solenoid.
Package Includes
- 2 x Lone Star Wireless Remotes
Receiver
Lanyard - Terminal Screws for screw in solenoids
- Floating keychain
- Twin blade posts & female spades for blade solenoids Installation instructions & Diagrams
1 Year Warranty
Product Features
- Easy Anchor Deployment from anywhere on your boat!
- Operating Range of up to 100 ft
- Operate from the transom, bow, or fly bridge
- Easy installation
LSM Wireless Anchor Winch Controller Diagram
Find Lone Star Marine boat anchor wireless remote controls on our on-line shop.
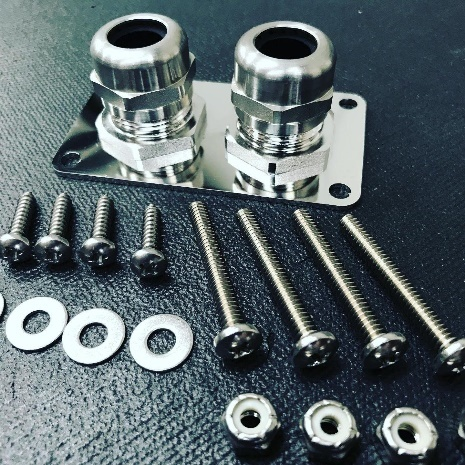
Gland Plate
Professionally mount your cables for your deck mounted boat anchor in a waterproof manner with Lone Star Marine’s AU Made 316 SS gland plate with waterproof glands.Fits cable size 16-35mm.
Find Lone Star Marine’s waterproof boat anchor mount accessories on our on-line shop.
Why Choose Form A Sign to supply your Lone Star Winch?
Melbourne-based marine specialists
✅ Many of our team are professional fishermen and understand what "just works" on boats.
✅ Experience with boat wraps, flooring & marine upgrades
✅ Quality products from trusted brands
✅ Custom installation solutions
✅ Fast turnaround times
✅ Combine your boat winch upgrade with a new boat wrap or U-DEK boat flooring for the ultimate fishing package.
We don’t just supply winches — we deliver complete marine upgrade solutions tailored to your needs.
Boat Winch and Anchor Blog
Boat winch and anchor tips and tricks from our experts.
Step-by-Step Guide for Installing a Lone Star Anchor Winch on Your Boat

How do I set my boat anchor in Westernport Bay?

How do I set my Lone Star boat anchor in Port Phillip Bay?